Creating GUI for PowerShell Scripting
A simple GUI for handling PowerShell scripts can prove useful if your team has PowerShell newbies. GUI-based PowerShell scripts can help newbies get started with PowerShell easily and move towards executing complex scripts later on. But to create such helpful GUI-based PowerShell scripts, you should understand how Windows forms can be handled in PowerShell scripts.
So, in this blog, let’s try to understand how to create a simple PowerShell script which invokes a windows form and gets the user input.
Note: Our simple GUI-based Windows form dependent PS script is going to take in the user input and output the same on the PowerShell console.
Adding .NET Framework classes for Windows Forms
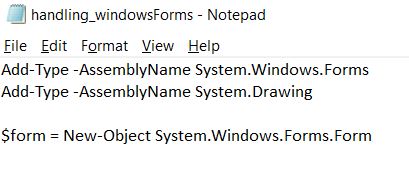
You need to load .Net Framework classes System.Windows.Forms and System.Drawing to create the Windows form. You need the System.Winows.Forms class to create an instance of the Windows form and the System.Drawing class for drawing the form. You can load these two classes into your script as follows:
- Add-Type -AssemblyName System.Windows.Forms
- Add-Type -AssemblyName System.Drawing
Try running your PowerShell script at this point. Nothing would happen, because we are yet to create the Windows form.
Note:
- Remember to save your script with a .ps1 extension.
- To run your PS script, navigate to the location where your .ps1 file is located, and execute it as shown in the image below.

Creating and Invoking the Windows Form
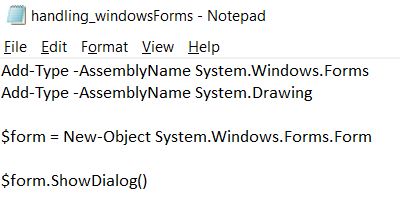
- Using the New-Object cmdlet you can create a Windows form instance and save it in a PowerShell variable $form as shown in the image.
- Now add the ShowDialog() method to the form as shown in the image. This method will invoke the form when you run the script.
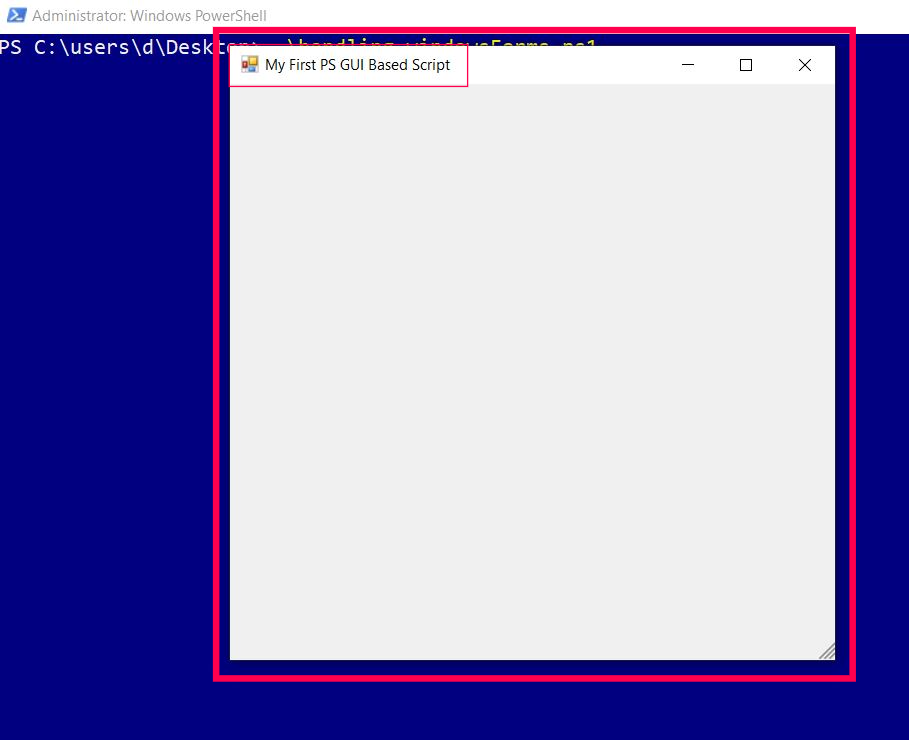
- Save your file and run the script. You should get an empty form as shown in the image.
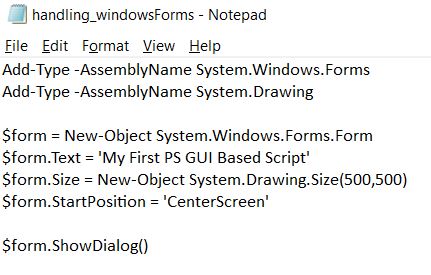
- You can make use of the Text, Size and StartPosition properties of the form object to add text, size and position the Windows form as shown in the image.
- Now run your script. The form will now contain a title and its size would be larger, since we modified the form’s object’s size property.
Why is the form empty?
Because we haven’t added anything to it yet. So let’s add some text to our Windows form, and give it a size and position it on the screen.
Note: Even though the form is empty, when you close it, you’ll notice that the cancel action being registered on your PS console. What you see is default behavior of Windows forms.
Now that the form for our PS script is ready, it’s time to add some controls (buttons) to it.
Adding Form Controls:
Adding Ok Button
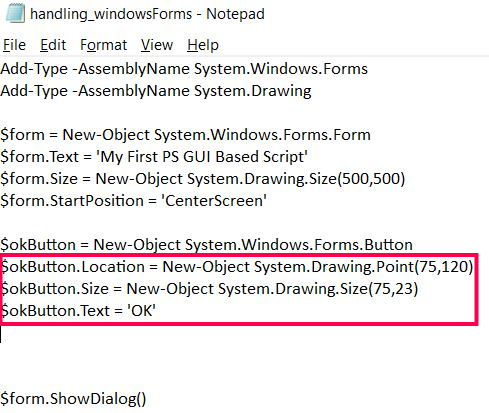
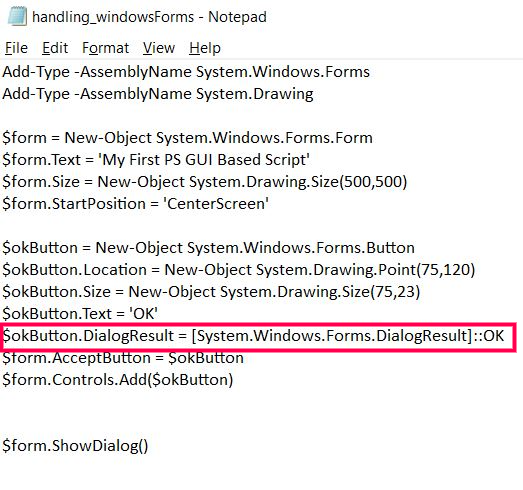
- Using the New-Object cmdlet you can create a Windows forms button instance and save it in a PowerShell variable $okButton as shown in the image.
- Now add location, size and text properties to the button as shown in the image.
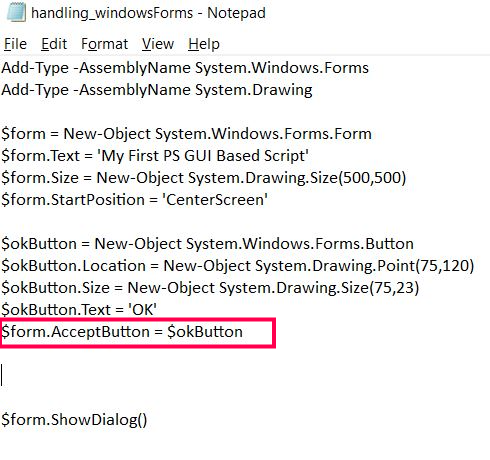
- To make the Windows form accept the button you created, you should set the AcceptButton property of the form to the button you just created ($okButton).
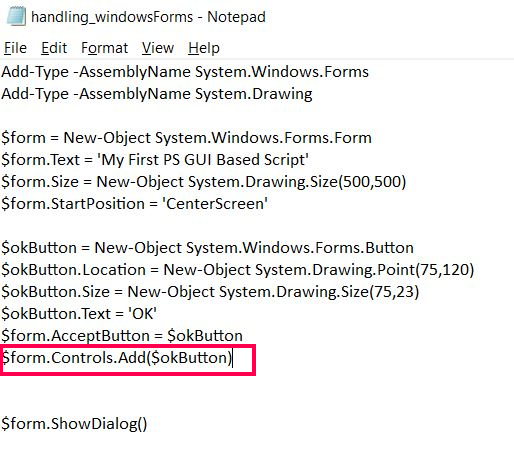
- Now you can add the button to the Windows form by including the following line.
- Save and run your script. The button you added shows up. But nothing happens when you click on it. This is because we haven’t added any event to the button yet.
- To associate an event with the button, you should set its DialogResult property to [System.Windows.Forms.DialogResult]::OK as shown in the image. Remember to add this line of code before you make the form accept the button you created.
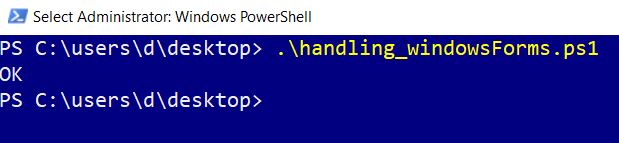
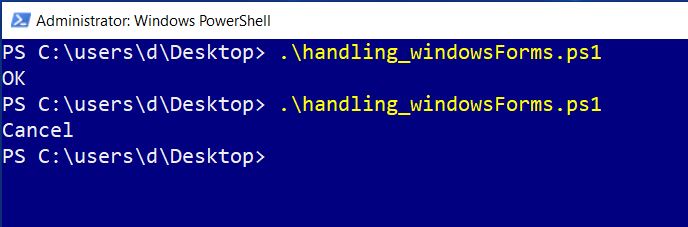
- Now save and run your script again. This time the button works and logs the OK action (wired to the button by you) on your PS console.


Now, let’s add the Cancel button to the form.
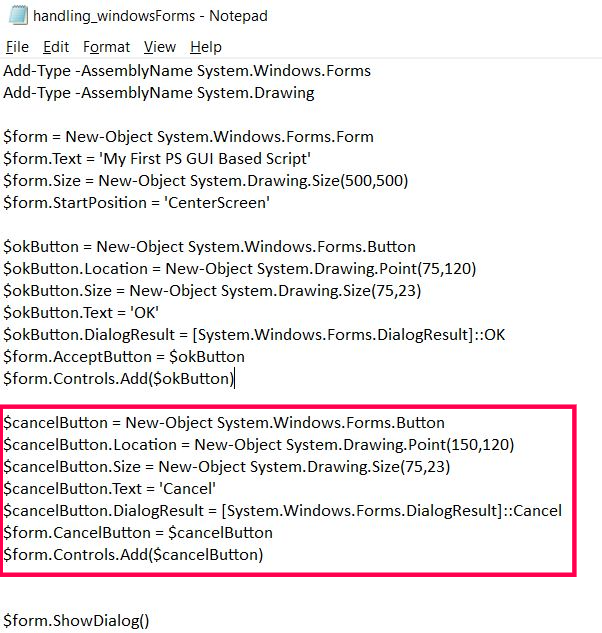
Adding Cancel Button
The process remains pretty much the same as above. The only difference is, this time, you should associate the cancel event, instead of the OK event, to the button. The code you should be including is shown in the image.
- First you create the window’s button instance. Then add properties (location, size and text). After this, you associate the cancel event that needs to be triggered when the button is clicked. Then make the form accept the newly created button.
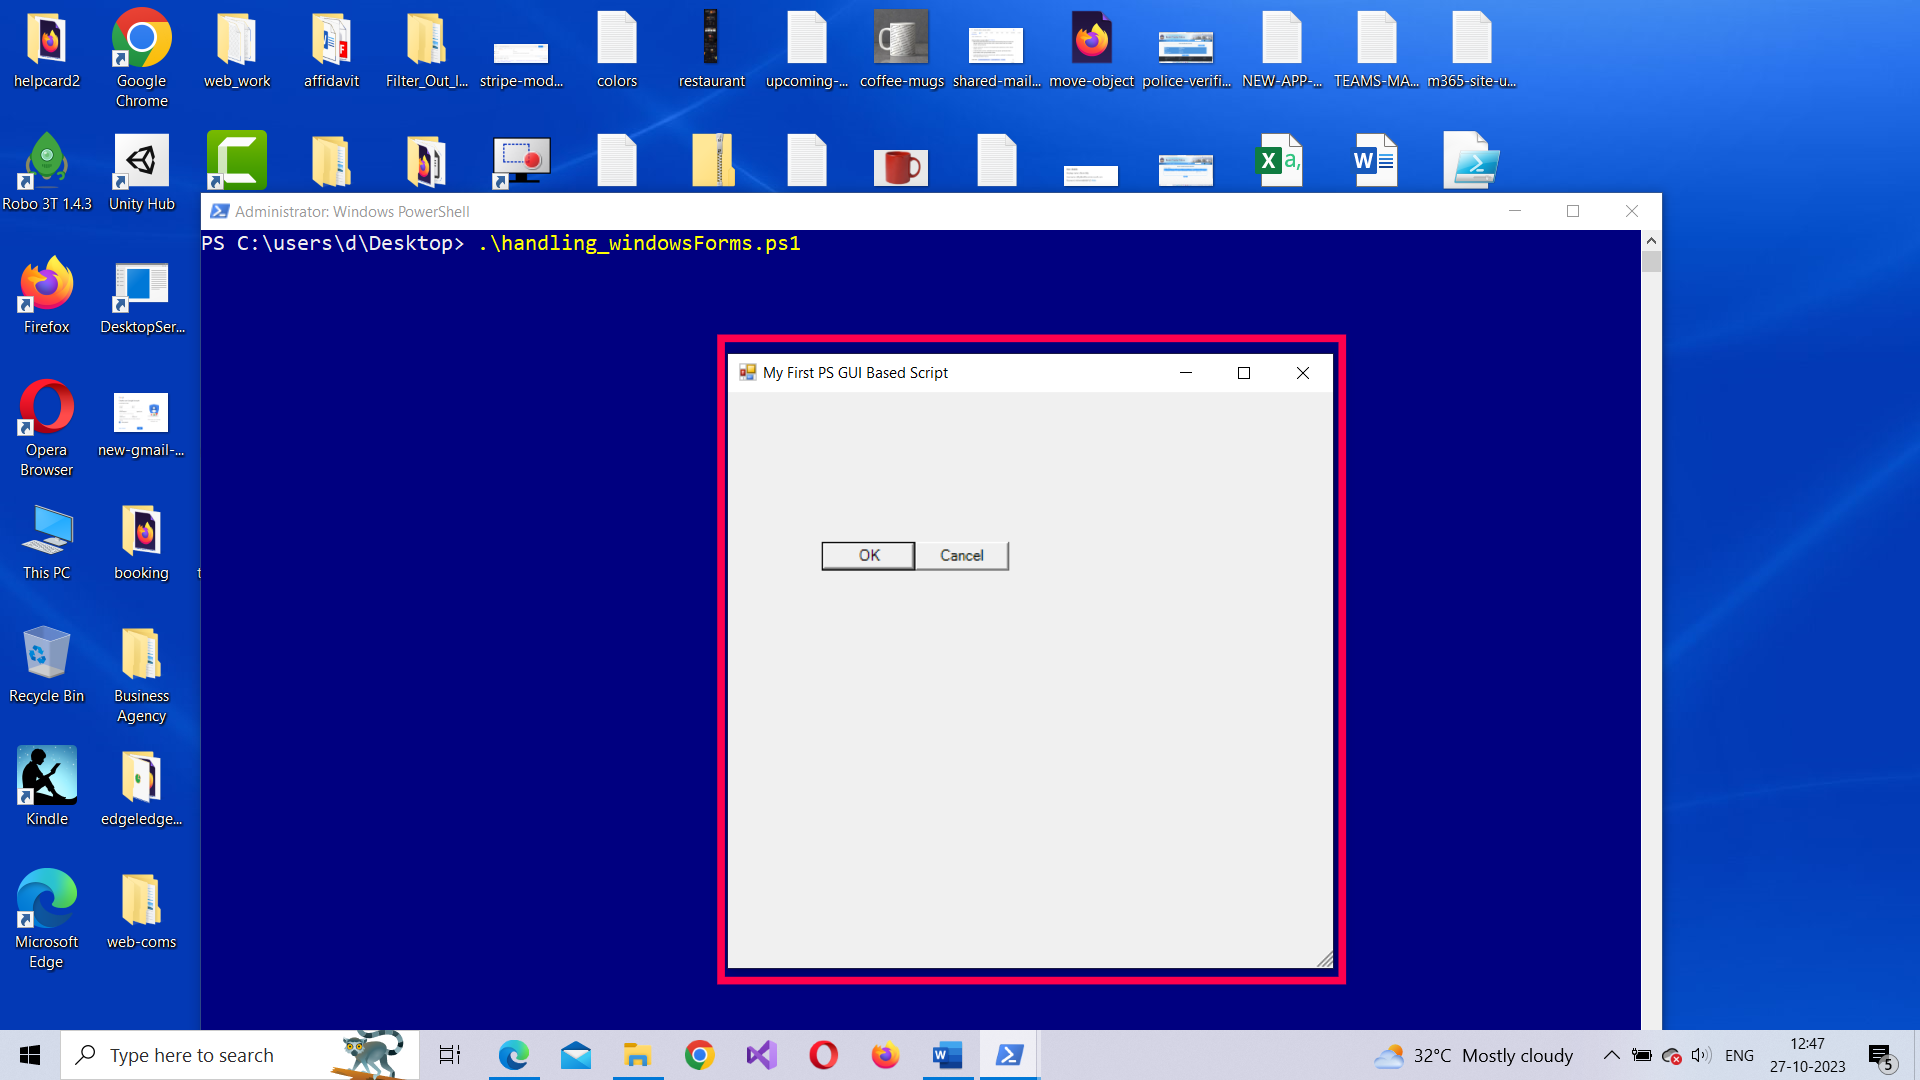
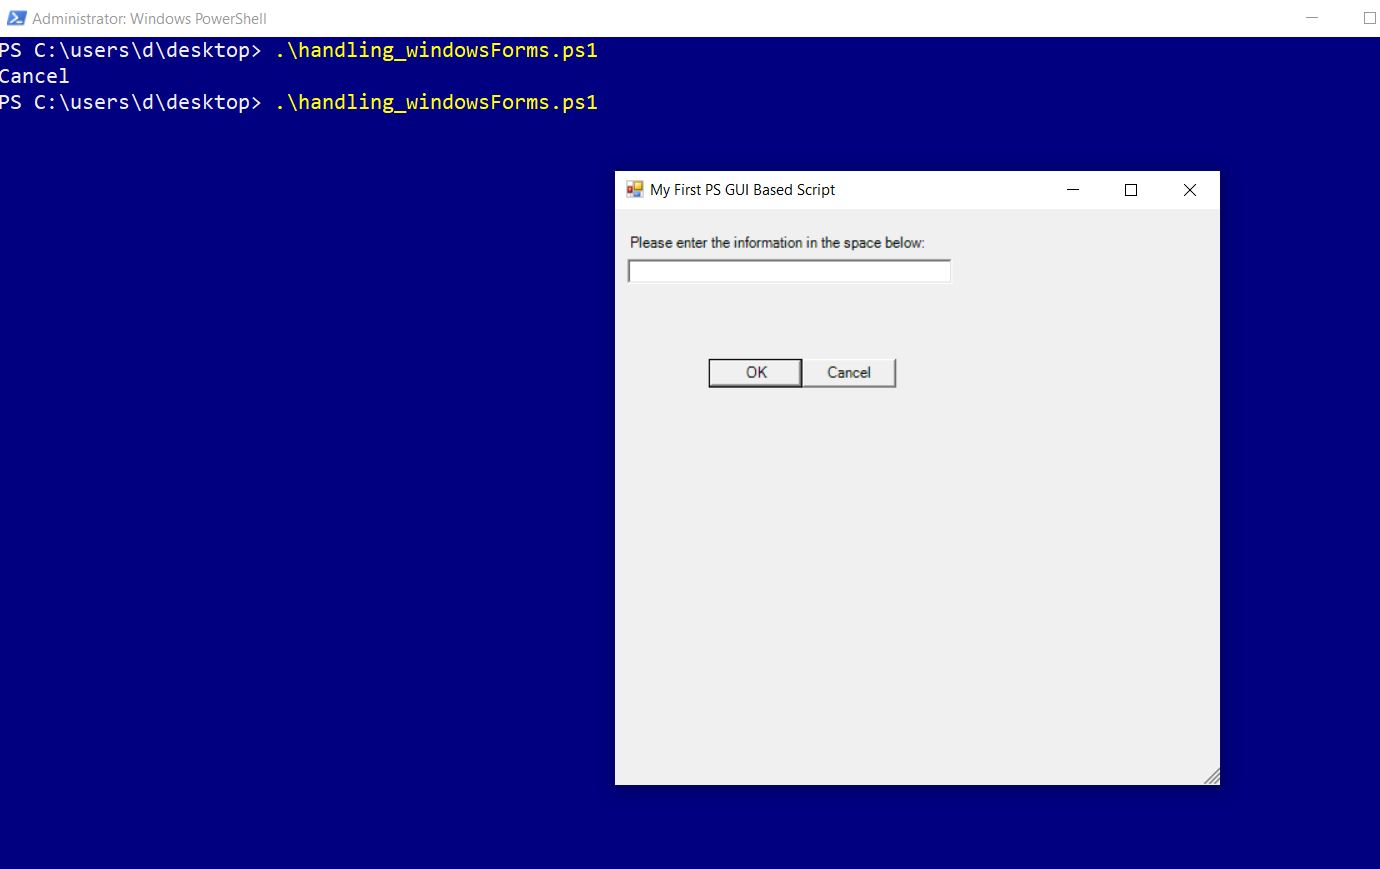
- If you save and run your script, you’ll see the form has two buttons: OK and Cancel. And since you have wired up both the buttons to Ok and Cancel actions, you’ll notice these actions get logged into your PS console (as shown in the images) when you click on the respective buttons.
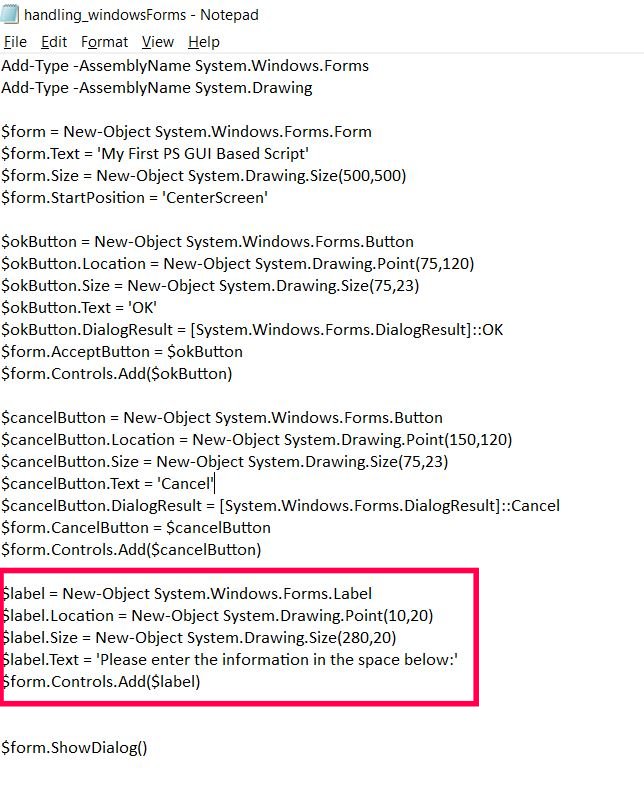
Adding Label to the Form
- First you create the windows form’s label instance. Then add properties (location, size and text) to the label. And finally, add the label to the form.
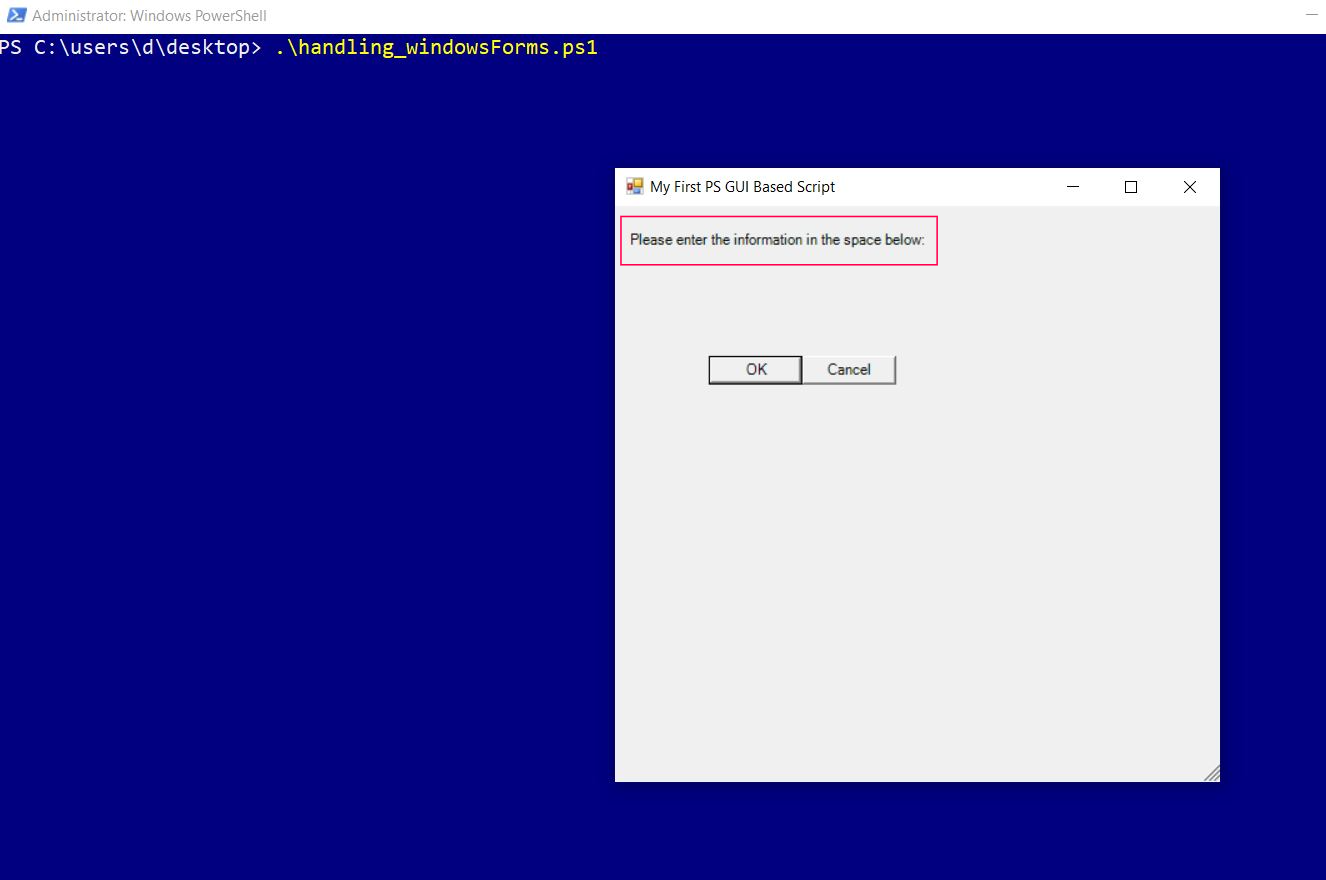
- If you save and run your script, you’ll see the form now contains a label which reads ‘Please enter the information in the space below as shown in the image.
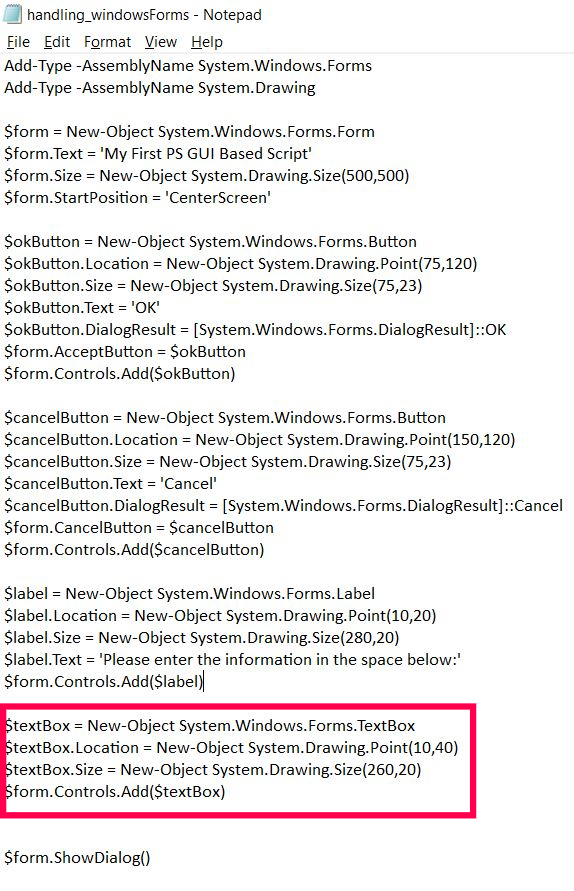
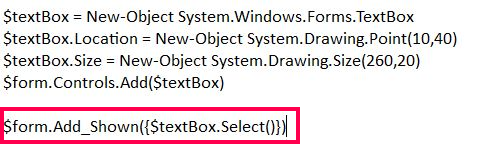
Adding Textbox to the Form
- First you create the windows form’s textbox instance. Then add properties (location, size and text) to the textbox. And finally, add the textbox to the form.
- If you save and run your script, you’ll see the form now contains a textbox that allows user to enter the input.
Selecting the User Input
- To select the user input, you need to include the following line of code, just below the textbox related code.
Writing simple logic for handling the user input
Now that our form controls are ready, let’s add a simple if-else condition to determine the script’s outcome based on the user input. If the user enters some text and clicks the Ok button, whatever that was entered should display on the PS console. If the user simple clicks the cancel button, then the message ‘you cancelled the operation’ should be displayed.
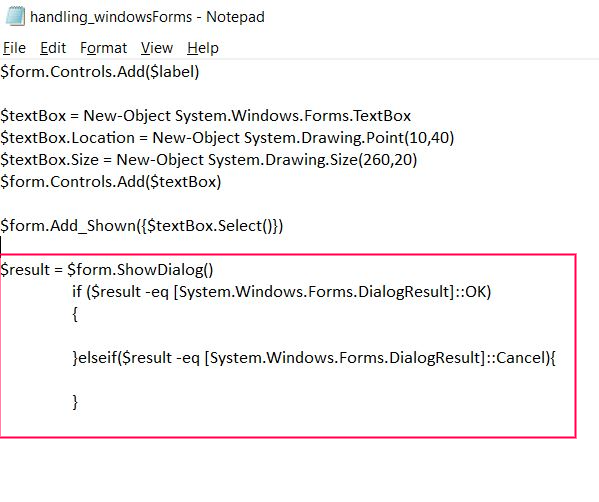
- Since ShowDialog() method of the form is the one that is going to receive or handle the user input, we will save it in a separate PS variable called $result and equate this variable to Windows forms Ok and Cancel events using an if-else condition as shown in the image below.
- If the user clicks the Ok button [which translates to action [System.Windows.Forms.DialogResult]::OK in Windows Forms terminology, we are going to grab the text which the user entered in the input box and display it on the PS console by using the Write-Host cmdlet.
- If the user clicks the cancel button [which translates to action [System.Windows.Forms.DialogResult]::Cancel in Windows Forms terminology, we are going to display the message “you cancelled the operation” on the PS console by using the Write-Host cmdlet.
- Save and run your script. When you enter some text and click the Ok button, the text you entered gets displayed on the PS console. If you choose to click the Cancel button, the message ‘you cancelled the operation’ gets displayed.